


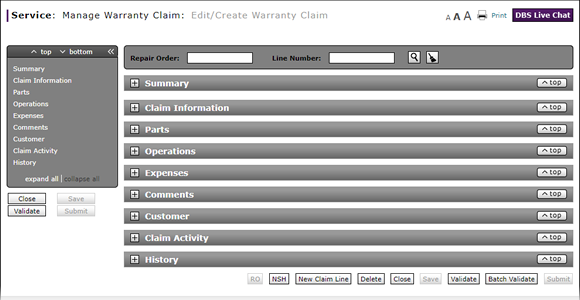
Complete the Parts Section of a Claim
|
|
 |
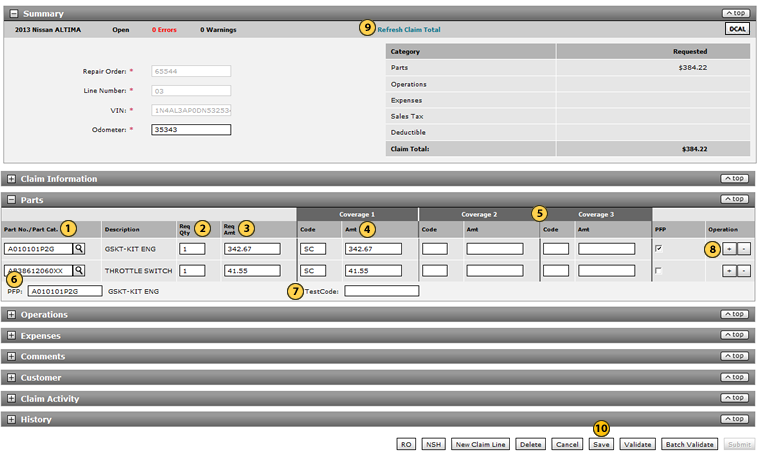
To complete the Parts section of the claim.
|
|
In the Part No./Part Cat. field, type the part number or a three-digit part category code. If you don't know the part number, click the Lookup icon to perform a search. Click here for instructions on how to search for a part number. |
|
|
In the Req Qty field, type the quantity requested for the repair part. |
|
|
In the Req Amt field, type the monetary amount requested for the part. |
|
|
If necessary, in the Coverage 1 Code field, update the coverage code. |
|
|
If the coverage amount is split between or among coverage types, complete the Coverage 2 Amt and Coverage 3 Amt fields as appropriate. |
|
|
If you entered line type "PP" in the Claim Information section, in the PFP (Primary Failed Part) field, you must enter a part number. |
|
|
If the primary failed part is a battery, alternator, or starter replacement parts, complete the TestCode field. |
|
|
As appropriate, click the Plus Sign to add additional parts. |
|
|
To update the claim total to reflect the sum of the parts you added to the claim, in the Summary section at the top of the page, click the Refresh Claim Total link. |
|
To save the information, click the Save button at the bottom-right of the page. |
To complete the Parts section of the claim.
- In the Part No./Part Cat. field, type the part number or a three-digit part category code. If you don't know the part number, click the Lookup icon to perform a search. Click here for instructions on how to search for a part number.
Note: After you enter the part number, the description automatically appears in the Description column.
Note: Use the part category code if you have a locally purchased part, such as a windshield wiper. - In the Req Qty field, type the quantity requested for the repair part.
- In the Req Amt field, type the monetary amount requested for the part.
- If necessary, in the Coverage 1 Code field, update the coverage code.
Note: The coverage code is automatically populated based on information entered in the Claim Information section. - If the coverage amount is split between or among coverage types, complete the Coverage 2 Amt and Coverage 3 Amt fields as appropriate.
Note: The payment amounts split among the Coverage Amt fields must be equal to the requested amount in the Req Amt field. - If you entered line type "PP" in the Claim Information section, in the PFP (Primary Failed Part) field, you must enter a part number.
Note: If you select the PFP checkbox, the PFP field will be auto-populated. - If the primary failed part is a battery, alternator, or starter replacement parts, complete the TestCode field.
Note: The test code is the same as the GR8 code and consists of nine digits. - As appropriate, click the Plus Sign to add additional parts.
- To update the claim total to reflect the parts information entered, in the Summary section at the top of the page, click the Refresh Claim Total link.
- To save the information, click the Save button at the bottom-right of the page.
Note: Click here for instructions to complete the Operations section.
- Add New Claim Line from Quick Entry Warranty Claim Page
- Add New Claim Line to a Repair Order
- Batch Validate a Warranty Claim
- Complete the Claim Information Section of a Claim
- Complete the Comments Section of a Claim
- Complete the Customer Section of a Claim
- Complete the Expenses Section of a Claim
- Complete the Operations Section of a Claim
- Complete the Summary Section of a Claim
- Look Up a Part
- Look Up an Operation Code
- Print a Warranty Claim
- Submit a Warranty Claim
- Use the Quick Jump Menu in a Warranty Claim
- Validate a Warranty Claim
- View DCAL
- View NSH for a Warranty Claim
- View the Claim Activity Section of a Claim
- View the Claim History Section of a Claim
|
|
Errors and warning messages are displayed in the Alerts area at the bottom of the Parts section. |

Complete the Parts Section of a Claim
|
|
|
To complete the Parts section of the claim.
|
|
In the Part No./Part Cat. field, type the part number or a three-digit part category code. If you don't know the part number, click the Lookup icon to perform a search. Click here for instructions on how to search for a part number. |
|
|
In the Req Qty field, type the quantity requested for the repair part. |
|
|
In the Req Amt field, type the monetary amount requested for the part. |
|
|
If necessary, in the Coverage 1 Code field, update the coverage code. |
|
|
If the coverage amount is split between or among coverage types, complete the Coverage 2 Amt and Coverage 3 Amt fields as appropriate. |
|
|
If you entered line type "PP" in the Claim Information section, in the PFP (Primary Failed Part) field, you must enter a part number. |
|
|
If the primary failed part is a battery, alternator, or starter replacement parts, complete the TestCode field. |
|
|
As appropriate, click the Plus Sign to add additional parts. |
|
|
To update the claim total to reflect the sum of the parts you added to the claim, in the Summary section at the top of the page, click the Refresh Claim Total link. |
|
To save the information, click the Save button at the bottom-right of the page. |