


Complete the Customer Section of a Claim
|
To complete the Customer section of a claim:
|
|
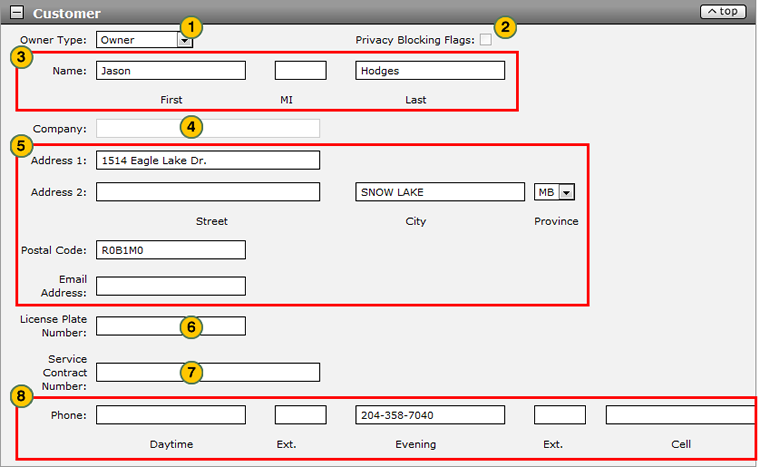
To complete the Customer section of a warranty claim: Note: If you search for a repair order and line number, the information in the Customer section is populated with the repair order information. Add additional information as necessary.
|
Warranty Claim Actions
Take Action on an Express Entry Warranty Claim

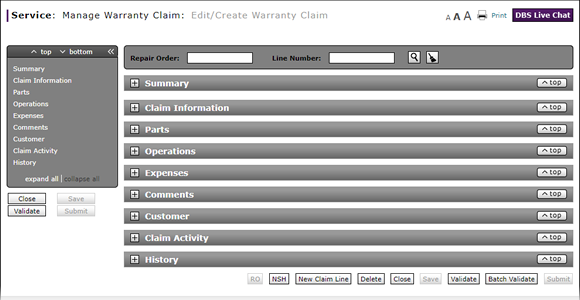
When you have entered warranty claim data, take action on an express entry warranty claim:
|
|
To delete a saved claim, click the Delete button. |
|
|
To cancel a claim after data has been validated, click the Cancel button. |
|
|
To save a claim in progress or a claim with errors, click the Save button. |
|
|
To validate claim entries, click the Validate button. |
|
|
To send the claim to the batch validation queue, click the Batch Validate button. |
|
|
To submit a validated claim with no errors, click the Submit button. |
To complete the Customer section of a warranty claim:
- From the Owner Type drop-down list, select an owner type.
- Type the customer name, address, email address, and telephone numbers to add or change the default customer information.
Note: Click here for instructions to view the Claim Activity section.
- About Warranty Claims: What You Need to Know
- Add New Claim Line from Quick Entry Warranty Claim Page
- Add New Claim Line to a Repair Order
- Batch Validate a Warranty Claim
- Complete the Claim Information Section of a Claim
- Complete the Comments Section of a Claim
- Complete the Expenses Section of a Claim
- Complete the Operations Section of a Claim
- Complete the Parts Section of a Claim
- Complete the Summary Section of a Claim
- Delete a Warranty Claim
- Look Up a Part
- Look Up an Operation Code
- Print a Warranty Claim
- Submit a Warranty Claim
- Use the Quick Jump Menu in a Warranty Claim
- Validate a Warranty Claim
- View DCAL
- View NSH for a Warranty Claim
- View the Claim Activity Section of a Claim
- View the Claim History Section of a Claim
|
|
DBS displays errors and warning messages in the Alerts area at the bottom of the Customer section. |

Complete the Customer Section of a Claim
|
To complete the Customer section of a claim:
|
|
To complete the Customer section of a warranty claim: Note: If you search for a repair order and line number, the information in the Customer section is populated with the repair order information. Add additional information as necessary.
|
Warranty Claim Actions
Take Action on an Express Entry Warranty Claim
When you have entered warranty claim data, take action on an express entry warranty claim:
|
|
To delete a saved claim, click the Delete button. |
|
|
To cancel a claim after data has been validated, click the Cancel button. |
|
|
To save a claim in progress or a claim with errors, click the Save button. |
|
|
To validate claim entries, click the Validate button. |
|
|
To send the claim to the batch validation queue, click the Batch Validate button. |
|
|
To submit a validated claim with no errors, click the Submit button. |