


Create a Edit a Parts Order
|
To create or edit a parts order: Note: Click here to view instructions for creating a Transient Owner Service (TOS) part order.
|
|
To create a edit a parts order:
|
Note: Click here for instructions on creating a TOS (Transient Owner Service) part order.
To create or edit a parts order:
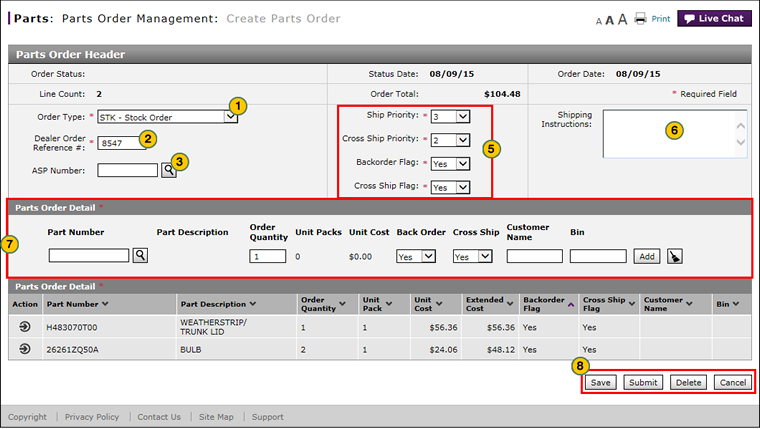
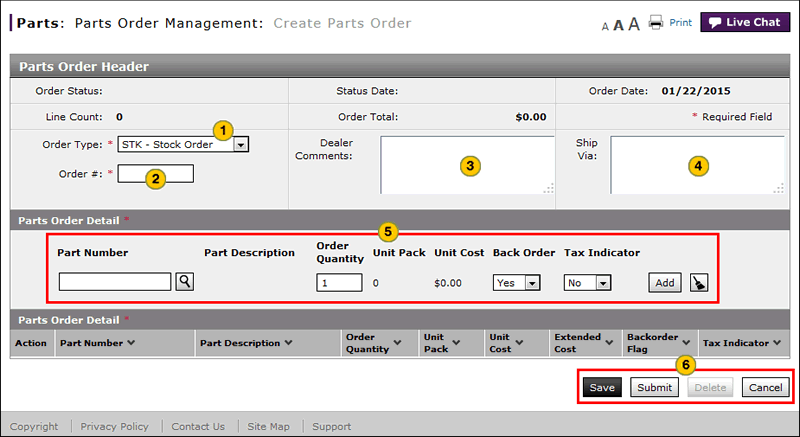
- From the Order Type drop-down list, select the order type.
- In the Dealer Order Reference # field, type a unique reference number to identify the parts order.
Note:
If the reference number is a duplicate number, Fred automatically generates a suffix and highlights the suffix in the Parts Order Detail section. After you type a unique Dealer Order Reference #, Fred clears the suffix. - To ship the order to your alternate shipping point (ASP), in the ASP Number field, type your ASP number or click the Lookup icon to select the ASP.
Note: The ASP number may also be referred to as the wholesale code or ship to code. - If you selected "SOL - Solicited Order" or "SVC - Service Campaign Order" from the Order Type drop-down list, complete the additional required fields.
- From the Ship Priority, Cross Ship Priority, Backorder Flag, and Cross Ship Flag drop-down lists, modify the default selections, if desired.
- In the Shipping Instructions field, type the shipping instructions for the parts order, if desired.
- Complete the Parts Order Detail section:
- Use the appropriate button to save, submit, delete, or cancel the parts order.
- Add a Part to an Order
- Create a Transient Owner Service Parts Order
- Create Parts Order Page Overview
- Delete a Part from an Order
- Delete a Parts Order from the Create or Edit Parts Order Page
- Edit a Detail Line on an Order
- Look Up a Part from the Create or Edit Parts Order Page
- Print Information
- Submit a Parts Order from the Create or Edit Parts Order Page
- Use the Parts Menu
- View ASR Data for a Part on a Parts Order
- View the Parts List on an Order
|
|
For VOR parts orders, you cannot have more than 40 part detail lines in a single order. |

|
|
For STK parts orders, you cannot have more than 999 part detail lines in a single order. |
|
|
For fastest processing, correct all errors before submitting a part order. |
Create a Edit a Parts Order
|
To create or edit a parts order: Note: Click here to view instructions for creating a Transient Owner Service (TOS) part order.
|
|
To create a edit a parts order:
|