


Create an Express Entry Warranty Claim
|
|
|
|
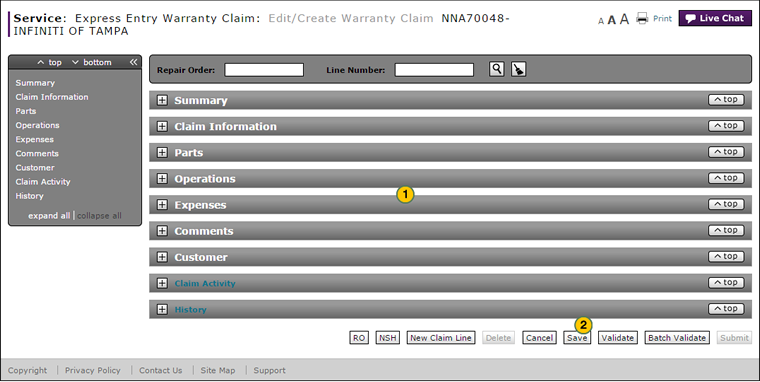
To create an express warranty claim:
|
|
Complete each section of the warranty claim. Click the links below for instructions on how to complete/view these sections:
|
||||
|
|
Click the Save button to save your changes. |
Warranty Claim Actions
Take Action on an Express Entry Warranty Claim

When you have entered warranty claim data, take action on an express entry warranty claim:
|
|
To delete a saved claim, click the Delete button. |
|
|
To cancel a claim after data has been validated, click the Cancel button. |
|
|
To save a claim in progress or a claim with errors, click the Save button. |
|
|
To validate claim entries, click the Validate button. |
|
|
To send the claim to the batch validation queue, click the Batch Validate button. |
|
|
To submit a validated claim with no errors, click the Submit button. |
Navigate Using Quick Keys
Use the quick keys below to navigate the sections of a warranty claim.
- CTRL+2 = Claim Info
- CTRL+3 = Parts
- CTRL+4 = Operations
- CTRL+5 = Expenses
- CTRL+6 = Comments
- CTRL+7 = Customer
To create an express warranty claim:
- Complete each section of the warranty claim. Click the links below for instructions on how to complete/view these sections:
- Summary
- Claim Information
- Parts
- Operations
- Expenses
- Comments
- Customer
- Click the Save button to save your changes.
Note: To validate the information in the claim, click the Validate button. Any errors that exist will be identified in red text. Errors must be corrected in order for the Submit button to be active. To submit a claim with no errors, click the Submit button.
- Add a New Claim Line on an Express Entry Warranty Claim
- Complete the Claim Information Section of an Express Entry Warranty Claim
- Complete the Comments Section of an Express Entry Warranty Claim
- Complete the Customer Section of an Express Entry Warranty Claim
- Complete the Expenses Section of an Express Entry Warranty Claim
- Complete the Operations Section of an Express Entry Warranty Claim
- Complete the Parts Section of an Express Entry Warranty Claim
- Complete the Summary Section of an Express Entry Warranty Claim
- Express Entry Warranty Claim Page Overview
|
|
You can save a warranty claim with warnings and error messages, and update the claim at a later time. |

Create an Express Entry Warranty Claim
|
|
|
|
To create an express warranty claim:
|
|
Complete each section of the warranty claim. Click the links below for instructions on how to complete/view these sections:
|
||||
|
|
Click the Save button to save your changes. |
Warranty Claim Actions
Take Action on an Express Entry Warranty Claim
When you have entered warranty claim data, take action on an express entry warranty claim:
|
|
To delete a saved claim, click the Delete button. |
|
|
To cancel a claim after data has been validated, click the Cancel button. |
|
|
To save a claim in progress or a claim with errors, click the Save button. |
|
|
To validate claim entries, click the Validate button. |
|
|
To send the claim to the batch validation queue, click the Batch Validate button. |
|
|
To submit a validated claim with no errors, click the Submit button. |
Navigate Using Quick Keys
Use the quick keys below to navigate the sections of a warranty claim.
- CTRL+2 = Claim Info
- CTRL+3 = Parts
- CTRL+4 = Operations
- CTRL+5 = Expenses
- CTRL+6 = Comments
- CTRL+7 = Customer