


Create or Edit an Alert
To create or edit an alert:
|
|
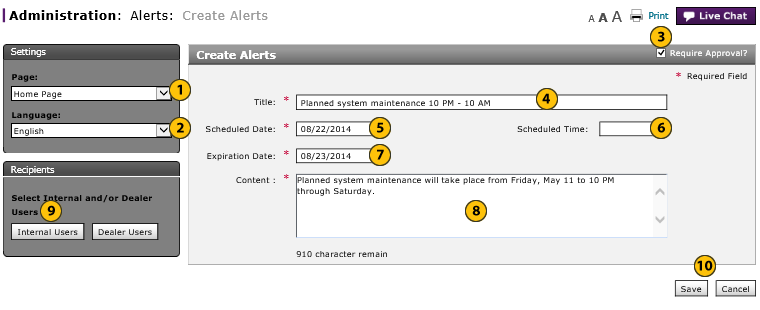
From the Page drop-down list, select the page where the alert will display. |
||
|
|
From the Language drop-down list, select the display language for the alert. |
||
|
|
If the item does not require approval, clear the Require Approval? checkbox. |
||
|
|
In the Title field, type a title for the alert. |
||
|
|
In the Scheduled Date field, use the calendar to select a start date. |
||
|
|
If the alert must display at or after a specific time, in the Scheduled Time field, type the scheduled start time in HH:MM format. |
||
|
|
In the Expiration Date field, use the calendar to select the expiration or end date. |
||
|
|
In the Content field, type the text of the alert. |
||
|
|
Select recipients for the alert.To select dealer users, click the Dealer User button. To select internal users, click the Internal User button. |
||
|
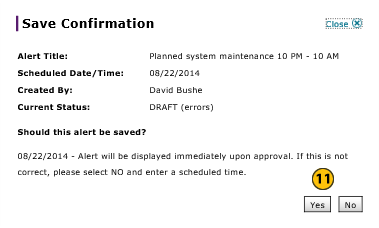
Click the Save button to save your changes, or click the Cancel button to close without saving. |
|||
|
Click the Yes button to confirm, or click the No button to close the window without confirming. |
To create or edit an alert:
- Select the page where the alert will display from the Page drop-down list.
- Select the display language for the alert from the Language drop-down list.
- If the item does not require approval, clear the Require Approval? checkbox.
- Type a title for the alert.
Note: The alert title is limited to 50 characters. - Select a scheduled date for the alert.
- Type a scheduled time for the alert.
- Select an expiration date for the alert.
- Type the content of the alert message in the space provided.
-
Select recipients for the alert.
Note: To learn about selecting recipients, click the applicable link. -
Click the Save button to save your changes, or click the Cancel button to close without saving.
Note: A confirmation message appears. -
Click the Yes button to confirm, or click the No button to close the window without confirming.
- Access the Create Alerts Page
- Access the Edit Alerts Page
- Alerts Page Overview
- Change the Status of an Alert
- Copy an Alert
- Create or Edit Alerts Page Overview
- Delete an Alert
- Filter the Alerts Summary
- Select Recipients by Dealer User for Geography Option
- Select Recipients by Dealer User for Hierarchy Option
- Select Recipients by Dealer User for Input a Dealer Number Option
- Select Recipients by Internal User for Geography Option
- Select Recipients by Internal User for Hierarchy Option
- View Alerts
- View Alerts Summary
- View or Print Alert Detail
|
|
Time in DBS is written in the 24-hour notation, where HH (00 to 23) is the number of full hours that have passed since midnight. |

Create or Edit an Alert
To create or edit an alert:
|
|
From the Page drop-down list, select the page where the alert will display. |
||
|
|
From the Language drop-down list, select the display language for the alert. |
||
|
|
If the item does not require approval, clear the Require Approval? checkbox. |
||
|
|
In the Title field, type a title for the alert. |
||
|
|
In the Scheduled Date field, use the calendar to select a start date. |
||
|
|
If the alert must display at or after a specific time, in the Scheduled Time field, type the scheduled start time in HH:MM format. |
||
|
|
In the Expiration Date field, use the calendar to select the expiration or end date. |
||
|
|
In the Content field, type the text of the alert. |
||
|
|
Select recipients for the alert.To select dealer users, click the Dealer User button. To select internal users, click the Internal User button. |
||
|
Click the Save button to save your changes, or click the Cancel button to close without saving. |
|||
|
Click the Yes button to confirm, or click the No button to close the window without confirming. |