


Add a Part to a Return
|
To add a part to a return:
|
|
To add a part to a return:
|
|
|
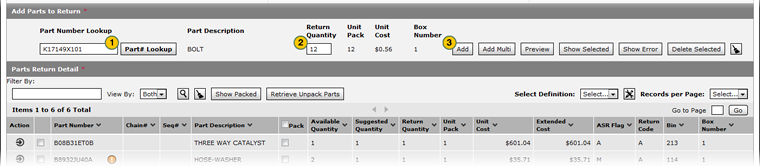
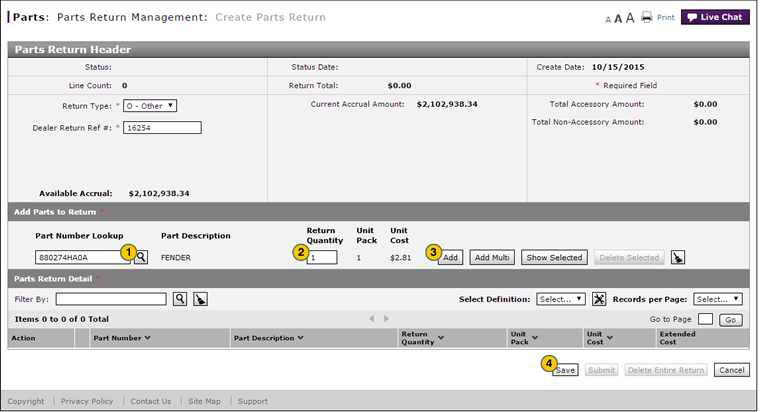
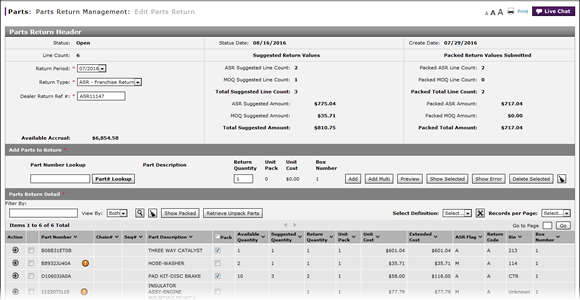
To add a part to a parts return, the return must be in "New" or "Open" status. |
To add a part to a parts return:
- Type a valid part number or perform a part lookup.
Note: Click here for more information on how to look up a part. - Type a valid return quantity.
Note: If an error icon appears, move your mouse over the icon to view any errors associated with the part or any remaining required detail and correct the error, as needed. - Click the Add button.
Note: If an error icon appears, move your mouse over the icon to view and correct any errors. - Click the Save button.
|
|
To add a part to a parts return, the return must be in "New" or "Open" status. |
Add a Part to a Return
|
To add a part to a return:
|
|
To add a part to a return:
|
|
|
To add a part to a parts return, the return must be in "New" or "Open" status. |