


Change the Parts Return Schedule for Multiple Dealers
To change the parts return schedule for multiple dealers:
|
|
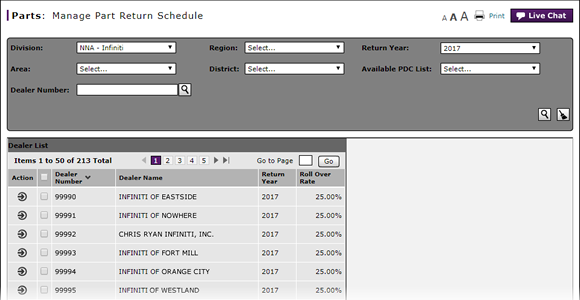
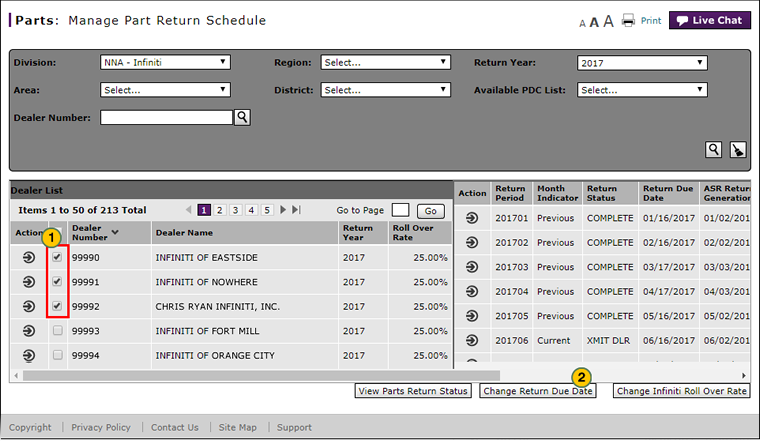
In the Dealer List section, select the checkbox for each dealer which will be included in the parts return due date change. |
|
|
Click the Change Return Due Date button. |
|
|
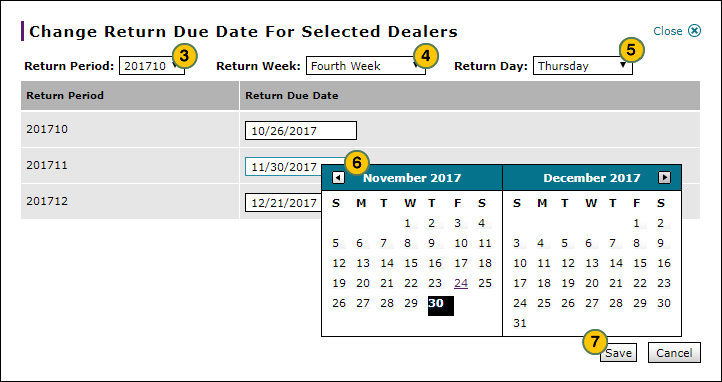
If necessary, from the Return Period drop-down list, select the desired return period. |
|
|
From the Return Week drop-down list, select the desired return week. |
|
|
From the Return Day drop-down list, select the day of the return week on which the parts return will be due. |
|
|
If desired, make further corrections to the return date by using the calendars in the Return Due Date field to select a specific date. |
|
|
When you have adjusted all return week and day information, click the Save button. |
To change the parts return schedule for multiple dealers:
- In the Dealer List section, select the checkbox for each dealer which will be included in the parts return due date change.
- Click the Change Return Due Date button.
- If necessary, from the Return Period drop-down list, select the desired return period.
Note: By default, the Return Period list displays all returns from the start of the return period specified through the end of the return year. If you select a new return period, only that period and the return periods that follow will be modified. - From the Return Week drop-down list, select the desired return week.
- From the Return Day drop-down list, select the day of the return week on which the parts return will be due.
Note: Once you select a return week and day, the Return Due Date field in the display section updates to display the targeted return dates. - If desired, make further corrections to the return date by using the calendars in the Return Due Date field to select a specific date.
- When you have adjusted all return week and day information, click the Save button.
- Adjust the Accrual Amount for a Parts Return
- Change the Parts Return Due Date
- Change the Rollover Rate
- Filter the Manage Part Return Schedule Page
- Manage Part Return Schedule Page Overview
- Manage Parts Return Cancellation Reasons
- Manage Parts Return Schedule Adjustment Reasons
- View the Accrual Adjustment History for a Dealer
Change the Parts Return Schedule for Multiple Dealers
To change the parts return schedule for multiple dealers:
|
|
In the Dealer List section, select the checkbox for each dealer which will be included in the parts return due date change. |
|
|
Click the Change Return Due Date button. |
|
|
If necessary, from the Return Period drop-down list, select the desired return period. |
|
|
From the Return Week drop-down list, select the desired return week. |
|
|
From the Return Day drop-down list, select the day of the return week on which the parts return will be due. |
|
|
If desired, make further corrections to the return date by using the calendars in the Return Due Date field to select a specific date. |
|
|
When you have adjusted all return week and day information, click the Save button. |