


Change Warning Message Configuration
|
|
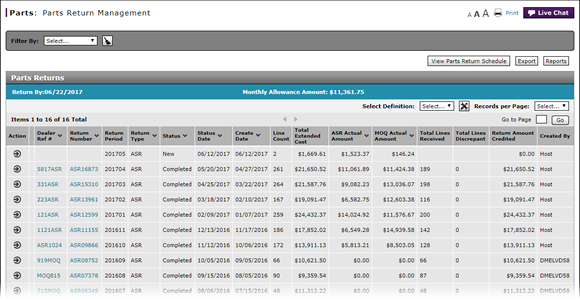
The parts return warning messages display when a dealer access the Parts Return Management page after one of the warning messages is triggered. |
Note: This task applies to internal users only.
To change the parts return warning message configuration:
|
|
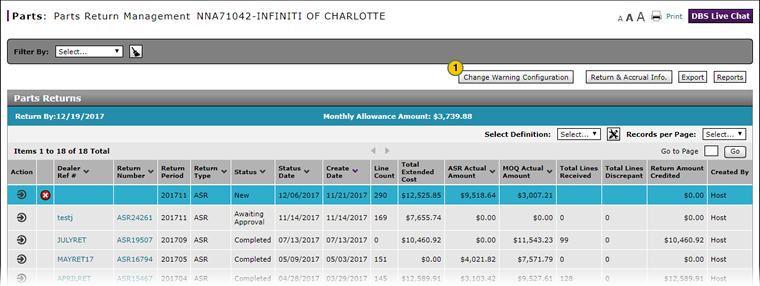
Click the Change Warning Configuration button. |
|
|
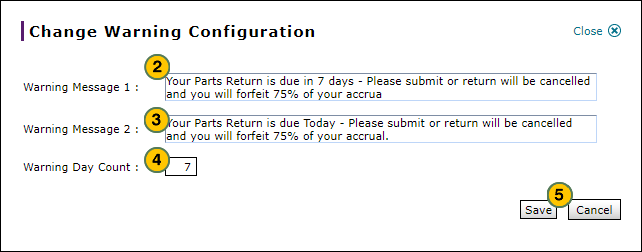
In the Warning Message 1 field, modify the warning message that will display to users the first time they access the Parts Return Management page after the warning message is triggered as set by the warning day count. |
|
|
In the Warning Message 2 field, modify the warning message that will display to users on the last day of the parts return period. |
|
|
In the Warning Day Count field, type the number of days before the parts return due date that the first warning message should be displayed to dealers. |
|
|
Click the Save button to save your changes, or click the Cancel button to close without saving. |
|
|
The parts return warning messages display when a dealer access the Parts Return Management page for the first time after one of the warning messages is triggered. |
Note: This task applies to internal users only.
To change the parts return warning message configuration:
- Click the Change Warning Configuration button.
Note: The Change Warning Configuration window appears. - In the Warning Message 1 field, modify the warning message that will display to users each time they access the Parts Return Management page after the warning message is triggered.
Note: The text in the warning message should match the information in the warning day count field. - In the Warning Message 2 field, modify the warning message that will display to users on the last day of the parts return period.
- In the Warning Day Count field, type the number of days before the parts return due date that the first warning message should be displayed to dealers.
- Click the Save button to save your changes, or click the Cancel button to close without saving.
Change Warning Message Configuration
|
|
The parts return warning messages display when a dealer access the Parts Return Management page after one of the warning messages is triggered. |
Note: This task applies to internal users only.
To change the parts return warning message configuration:
|
|
Click the Change Warning Configuration button. |
|
|
In the Warning Message 1 field, modify the warning message that will display to users the first time they access the Parts Return Management page after the warning message is triggered as set by the warning day count. |
|
|
In the Warning Message 2 field, modify the warning message that will display to users on the last day of the parts return period. |
|
|
In the Warning Day Count field, type the number of days before the parts return due date that the first warning message should be displayed to dealers. |
|
|
Click the Save button to save your changes, or click the Cancel button to close without saving. |