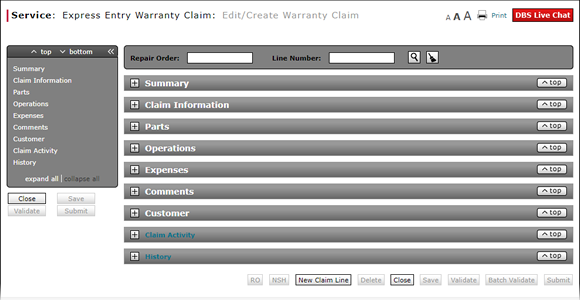

To complete the Operations section of an express entry warranty claim:
Note: If you search for a repair order and line number, the information in the Operations section is populated with the repair order information. Add additional information as necessary.
- From the Sub drop-down list, select "Y" if the operation or labor was outsourced to a third party.
- If the labor was not outsourced or sublet to a third party, in the Tech field, type the technician name.
- In the Op Code field, type the applicable operation code.
- In the Req Hrs field, type the amount of time the dealer is allowed to perform the specific operation for the operation code.
- In the Req Amt field, type the requested monetary labor amount.
- If necessary, in the Coverage 1 Code field, update the coverage code.
Note: The coverage code is automatically populated based on information entered in the Claim Information section. - In the Coverage 1 Amt field, enter the amount covered for the operation.
- If the coverage amount is split between or among coverage types, complete the Coverage 2 and Coverage 3 fields as appropriate.
- In the DTC column, click the N link to add a diagnostic test code.
- If the selected operation should be set as the primary operation, select the PO checkbox.
- As appropriate, click the Plus icon to add additional operations.
Note: To save a claim with errors or warnings, click the Save button. To validate the information in the claim, click the Validate button. To submit a claim with no errors, click the Submit button.
- Complete the Claim Information Section of an Express Entry Warranty Claim
- Complete the Comments Section of an Express Entry Warranty Claim
- Complete the Customer Section of an Express Entry Warranty Claim
- Complete the Expenses Section of an Express Entry Warranty Claim
- Complete the Summary Section of an Express Entry Warranty Claim
- Express Entry Warranty Claim Page Overview
|
|
The Sub (Sublet) field displays a default value of "N". A value of "Y" indicates this operation or labor was outsourced to a third party. |
|
|
If the line type in the Claim Information section is PO, select the PO checkbox for the operation code that describes the labor operation necessary to correct the primary complaint. |
Complete the Operations Section of an Express Entry Warranty Claim

To complete the Operations section of an express warranty claim:
Note: If you search for a repair order and line number, the information in the Operations section is populated with the repair order information. Add additional information as necessary.
|
|
From the Sub drop-down list, select "Y" if the labor was outsourced or sublet to a third party. |
|
|
If the labor was not outsourced or sublet to a third party, in the Tech field, type the technician name. |
|
|
In the Op Code field, type the six-character operation code that specifies the type of repair performed. |
|
|
In the Req Hrs field, type the amount of time the dealer is allowed to perform the specific operation for the operation code. |
|
|
In the Req Amt field, type the requested monetary labor amount. |
|
|
If necessary, in the Coverage 1 Code field, update the coverage code. |
|
|
In the Coverage 1 Amt field, enter the amount covered for the operation. |
|
|
If the coverage amount is split between or among coverage types, complete the Coverage 2 and Coverage 3 fields as appropriate. |
|
|
If the operation code is for labor to perform a diagnostic test, in the DTC column, click the N link to add a diagnostic test code. |
|
If the selected operation should be set as the primary operation, select the PO checkbox. |
|
|
As appropriate, click the Plus icon to add additional operations. |
Warranty Claim Actions - express
Take Action on an Express Entry Warranty Claim

When you have entered warranty claim data, take action on an express entry warranty claim:
|
|
To delete a saved claim, click the Delete button. |
|
|
To cancel a claim after data has been validated, click the Cancel button. |
|
|
To save a claim in progress or a claim with errors, click the Save button. |
|
|
To validate claim entries, click the Validate button. |
|
|
To send the claim to the batch validation queue, click the Batch Validate button. |
|
|
To submit a validated claim with no errors, click the Submit button. |


