


View, Print, or Email Window Sticker from the Inventory Search Page
|
|
You must have Adobe® Reader® (.pdf) installed on your computer to view the window sticker. |
|
|
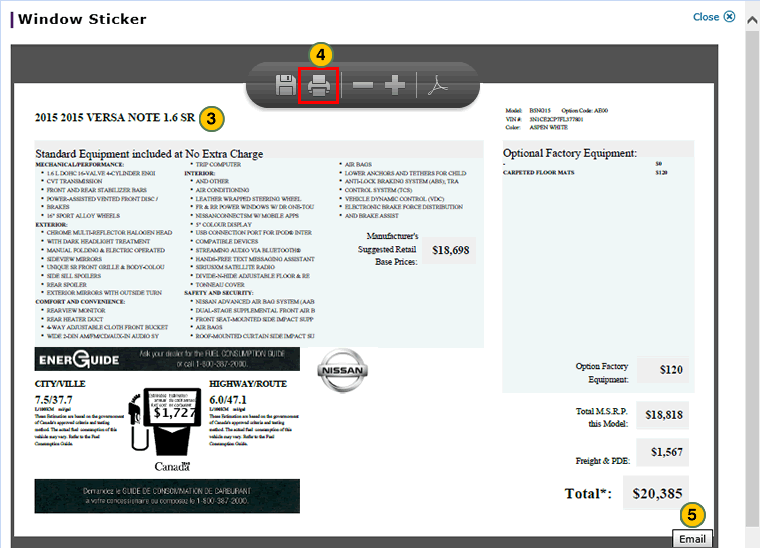
Nissan Canada, Inc. (NCI) refers to the window sticker as the vehicle pricing sticker. |
To view, print, or email the window sticker from the Vehicle Inventory page:
|
|
|
|
To view vehicle detail:
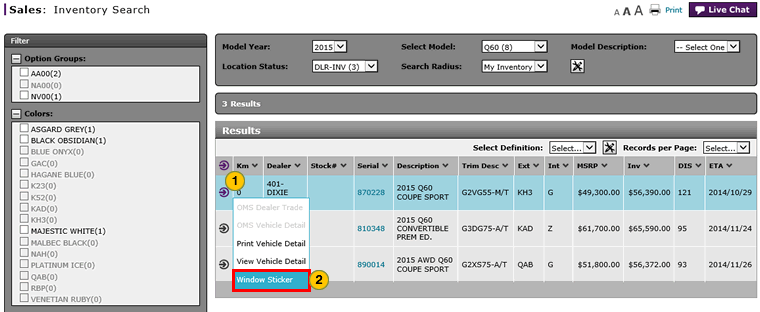
- Move your mouse pointer over the Action icon for the selected vehicle.
- From the Action menu, select the Window Sticker option.
- View the window sticker.
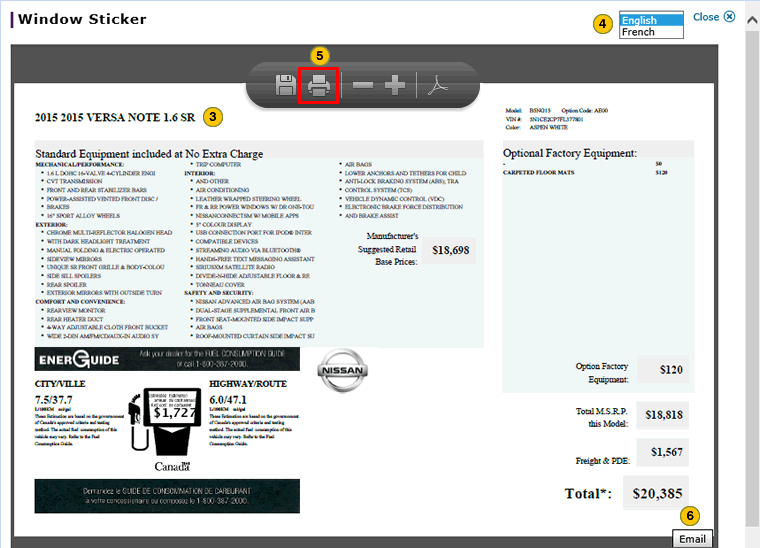
- Select the desired language from the drop-down list.
- Click the Printer icon to print the window sticker if required.
- To email the window sticker, click the Email button at the lower-right corner of the window sticker.
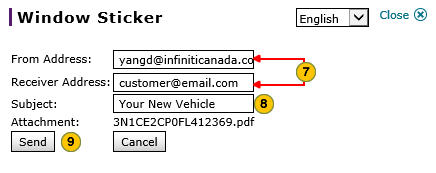
Note: A window opens for you to address the email. - Type the sender's email address in the From Address and in the Receiver Address type the recipients' email addresses.
- In the Subject field, type a subject for the email.
- Click the Send button.
View, Print, or Email Window Sticker from the Inventory Search Page
|
|
You must have Adobe® Reader® (.pdf) installed on your computer to view the window sticker. |
|
|
Nissan Canada, Inc. (NCI) refers to the window sticker as the vehicle pricing sticker. |
To view, print, or email the window sticker from the Vehicle Inventory page:
|
|
|
|