


Change the Status of an Event
|
|
 |
To change the status of an event:
|
|
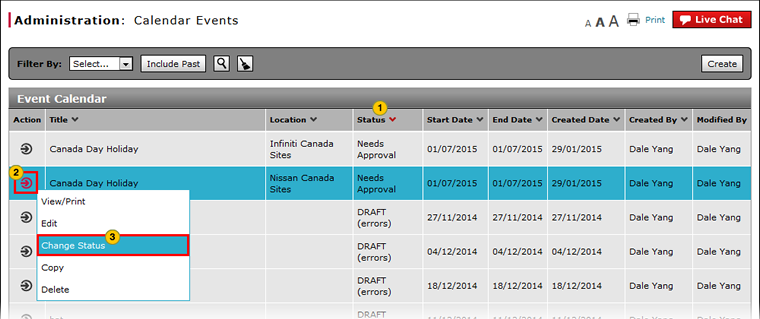
Select an event. |
|||
|
|
Move your mouse pointer over the Action icon. |
|||
|
|
From the Action menu, select the Change Status option. |
|||
|
|
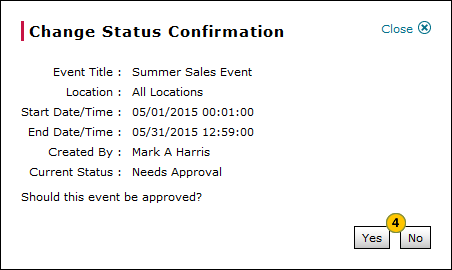
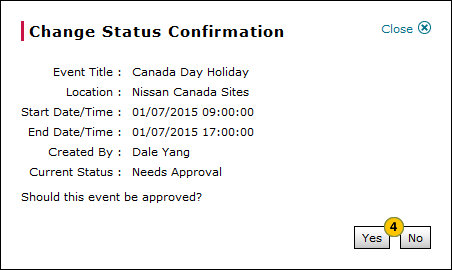
Click the Yes button to confirm, or click the No button to close the window without confirming.
|
|
|
If the event status is "Approved", changing the status updates the event status to "Needs Approval." If the event status is "Needs Approval", changing the status updates the event status to "Approved." |
|
|
An event will not display until it is in an approved status AND the scheduled time has passed. |
To change the status of an event:
- Select an event.
- Move your mouse pointer over the Action icon.
- From the Action menu, select the Change Status option.
Note: A confirmation message appears. - Click the Yes button to confirm, or click the No button to close the window without confirming.
|
|
If the event status is "Approved", changing the status updates the event status to "Needs Approval." If the event status is "Needs Approval", changing the status updates the event status to "Approved." |
|
|
An event will not display until it is in an approved status AND the scheduled time has passed. |
|
|
You cannot change the status of a published communication item. You must delete the item if you want to remove it from display. |
Change the Status of an Event
|
|
|
To change the status of an event:
|
|
Select an event. |
|||
|
|
Move your mouse pointer over the Action icon. |
|||
|
|
From the Action menu, select the Change Status option. |
|||
|
|
Click the Yes button to confirm, or click the No button to close the window without confirming.
|
|
|
If the event status is "Approved", changing the status updates the event status to "Needs Approval." If the event status is "Needs Approval", changing the status updates the event status to "Approved." |
|
|
An event will not display until it is in an approved status AND the scheduled time has passed. |