


Generate a Report (Internal Users)
|
|
|
|
To generate a report:
|
|
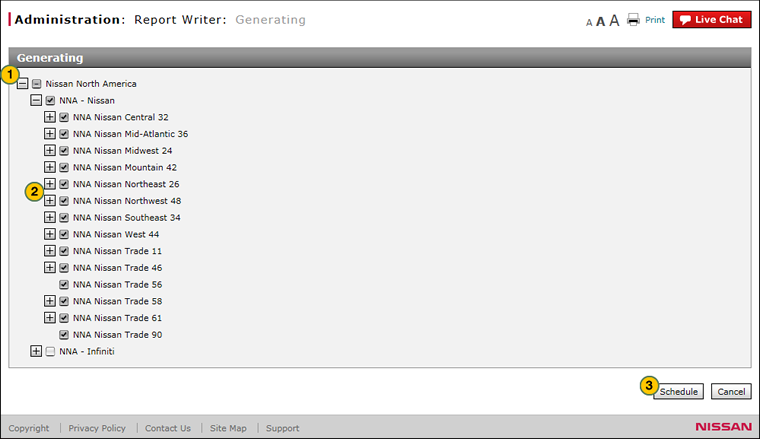
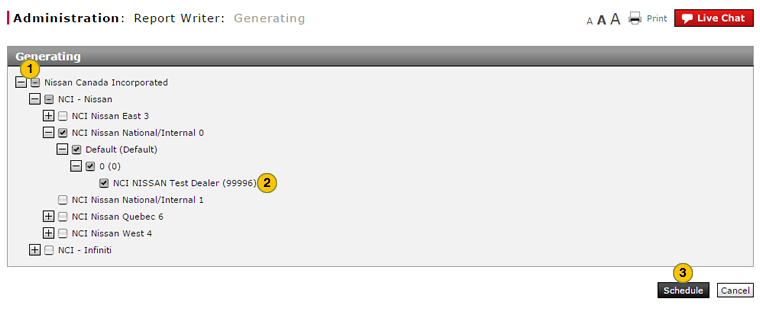
Click the plus sign beside each level to display the next lower level until you reach the level needed. |
|
|
Click the checkbox beside each region, city, or dealer you wish to include in the report. |
|
|
Click the Schedule button. |
|
|
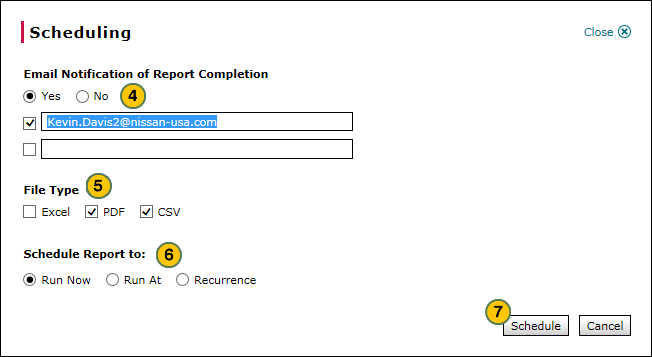
From the Email Notification of Report Completion options, select "Yes" if you would like to receive an email notification when the report is generated, or "No" if you do not want to receive an email notification. |
|
|
From the File Type options, select one or more file types. |
|
|
From the Schedule Report to options, select when you want the report to run. |
|
|
Click Schedule. |
To generate a report:
- Click the plus sign beside each level to display the next lower level until you reach the level needed.
- Click the checkbox beside each region, city, or dealer you wish to include in the report.
- Click the Schedule button.
Note: Click the Cancel button to cancel without saving. - From the Email Notification of Report Completion options, select "Yes" if you would like to receive an email notification when the report is generated, or "No" if you do not want to receive an email notification.
Note: If you selected "Yes", either select the checkbox next to your email address, or type additional addresses in the blank field and select the checkbox next to the field.
From the File Type options, select one or more file types. - From the Schedule Report to options, select when you want the report to run.
Note: If you select "Run At", you must select a start date and time for the report to generate.
Note: If you select "Recurrence", you must select the date, time, and recurrence for the report to generate. - Click Schedule.
Generate a Report (Internal Users)
|
|
|
|
To generate a report:
|
|
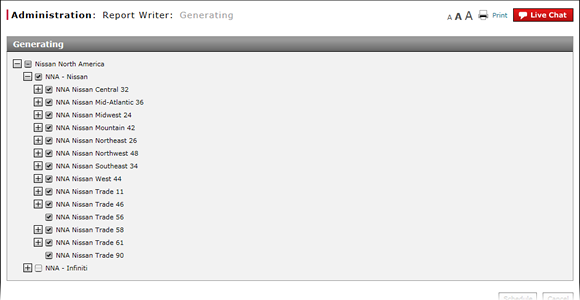
Click the plus sign beside each level to display the next lower level until you reach the level needed. |
|
|
Click the checkbox beside each region, city, or dealer you wish to include in the report. |
|
|
Click the Schedule button. |
|
|
From the Email Notification of Report Completion options, select "Yes" if you would like to receive an email notification when the report is generated, or "No" if you do not want to receive an email notification. |
|
|
From the File Type options, select one or more file types. |
|
|
From the Schedule Report to options, select when you want the report to run. |
|
|
Click Schedule. |